Tuesday, April 30, 2013

Take a Stitch Tuesday


Weeks 1 to 4

TAST - Weeks 1 to 4

My grandmother, Memere Charleboix,  taught me to embroider when I was seven or eight. I still have that very first piece. It was my very first stitching project.

I've always loved embroidery and have used it often, but am not real familiar with many stitches, either by name or how to do them.

Taking a class with Sue Spargo this winter and learning a lot of her favourite stitches has really made me want to learn more.

In the past, I had often checked sharon b's blog, In A Minute Ago,  whenever I needed help with a specific stitch. Her blog is now called Pin Tangle 

In January, 2012, Sharon started TAST – Take a Stitch Tuesday  – where she posts a hand embroidery stitch to add to the list. She is now at Stitch 64 but you can join in at any time. You then link back to her site by leaving your web address in a comment of her latest TAST post.

I will attempt to do some embroidery every week and hopefully at some point get caught up.

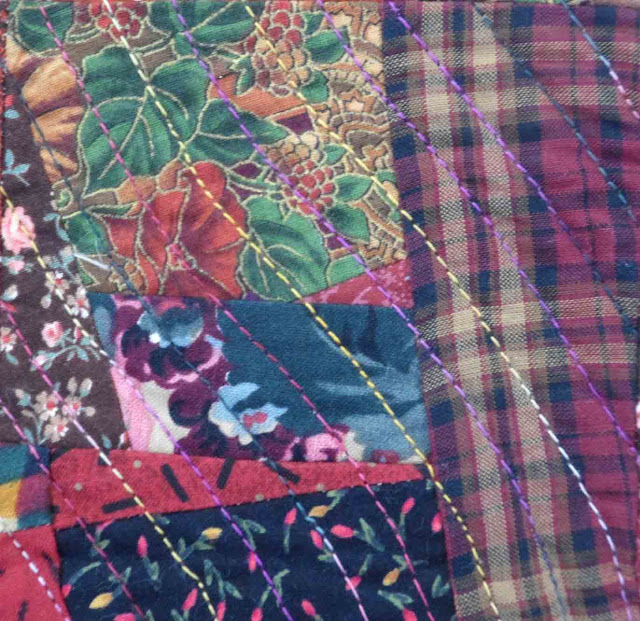
I have a big stack of upholstery samples, so I'm going to use that for this project. I cut the samples into 8” x 8” and washed them to soften them up a bit.

I will use the stitch of the day to make a 4 “ frame and then use mostly that stitch in the frame. Learning how to use one stitch in different situations is the object of the game.
I can add other stitches if I need to.
I can the frame slightly bigger depending on the stitch.
They're my rules, I can break them if I want to.

So here we go!

Week 1 – Fly Stitch

Other stitches: French Knot

Fly Stitch


Week 2 – Buttonhole Stitch

Buttonhole Stitch


Week 3 – Feather Stitch

Other stitches:  French knots

Feather Stitch


Week 4 – Cretan Stitch

I borrowed Luiz Vaz's moon, his is much nicer than mine.  Have a look at his wonderful stitches here.

Other stitches: Fly Stitch (water) and Stem Stitch (under the trees)

Cretan Stitch

I will link up to TAST at Pin Tangle. Check out all the beautiful work going on there.
Also linking to The Needle and Thread WIP Wednesday, have a look at what other Canadians bloggers are up to.


Happy Stitching,

Terry


Saturday, April 27, 2013

NOFA Meeting April 20, 2013


Northern Ontario Fibre Artists met last Saturday to work on our group project that will be displayed at our very own show “A Journey in Thread” which will be held in June.

The group project “Seven Create” has been ongoing for over a year and consists of seven curved pieces that must all fit together to hang on a single rod.

"Seven Create" WIP

The object of the workday was to trim all the pieces that are approximately 4 ½ feet long, so they could be completed and bound.

My piece is the first on the left and here it is finally done!   

You will to wait to see the other six.

My piece


It's all about texture and neutrals only!


A couple of close-ups.


How's this for getting into your work.


Mission accomplished, everyone went home to put the finishing touches on their pieces.

It was a great day.

Linking up to Nina Marie's Off the Wall Friday.

Happy Quilting,

Terry


Friday, April 19, 2013

Upcycling #1


Quilt Documentation # 137

Upcycling #1


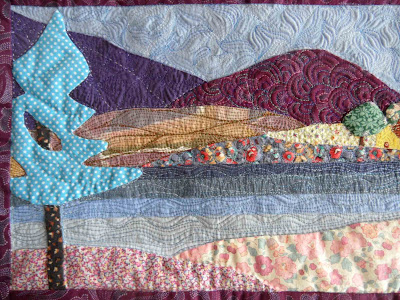
While doing some cleaning out recently, I came across half a dozen little landscape quilts that I made a long, long time ago. They came very close to being trashed and then I thought I might want to play a little to see what I could do.

The appliqueing was pretty bad (I was just learning) and the fabric.......well, just look for yourself.

This is what I started out with:

Add caption


I decided to leave the hand quilting and added a whole lot of free motion quilting.


Time to tackle the polka dot tree. I picked out 3 shades of green, light, medium and dark and started with the light then adding the medium and finally the dark.

light green
medium green


dark green
more dark green


For the grass, I used the same thread but reversed the order of the shades of green.

grasses - dark green

grasses - medium green

grasses - light thread


A little tweaking on one of the hills. I tone down the red flowers with a purple marker before stitching a grid in gold and brown thread.

tone down hill


I did not mind the colour so much under the tree, related to the mountains, so I added some paisley shapes to make it look like rocks.....maybe.

rocks


There was a lot of distortion going on by the time I finished all that thread painting.

distorted

I blocked it and squared it up.

blocked

And added a facing.

Upcycling #1

Not sure what I'll do with it now, but it was lots of fun.  It measured 12" x 16", now 9" x 13".

I called it #1 because I think I may do this again.

http://ninamariesayre.blogspot.ca/2013/04/threadpainting-lily-off-wall-friday.html
Happy quilting,

Terry

Wednesday, April 17, 2013

Quilting Cruise Memories


Quilt Documentation # 136

Here's a piece I just finished.   I was very lucky to be able to take a workshop with Sue Spargo while a quilting cruise in New Zealand and Australia, this past January. The classes were held on the days at sea, so we were still able to partake in all the excursions while in port.

Quilting Cruise Memories
This was really out of the box for me. I had never worked with wool and although I had a little knowledge of some embroidery stitches it was a real eye opener to learn where and how to apply them to the applique design, as well as learn many new stitches.

These are close-ups of the blocks:

Block #1

Block #1 - before quilting

Block #1 - quilted

Block #1 - detail & lady bug
Sue showed us how to make lady bugs and bumble bees.  Then I copy my roommate's caterpiller on Block #3.

Block #2

Block #2 - before quilting

Block #2 - quilted

Block #2 - detail - bumble bee and red leather circles


Block #3

Block #3 - before quilting 


Block #3 - quilted

Block #3 -detail &  caterpiller 

The border is from a piece of wool that my husband brought back from Peru.  I believe it is Llama wool (which I felted for this).

I was not sure how to finish this quilt but I know Sue uses cotton in the blocks as well as backing and binding. I used a cotton print for the back and decided to face it with the same fabric instead of adding a binding. Little triangles in the corners are used to insert a slat for hanging and one could be placed at the bottom to weigh it down if it was needed.

Quilting Cruise Memories - back

label


I really need to thank my roommate, Susan who so generously let me “shop” in her wonderful stash of hand dyed wool and threads, as well as Sue Spargo who shared all her supplies with everyone. Thank you Sue and Sue.

I have already used a lot of the embroidery stitches in another project and really, really  liked working with wool and will definitely be using it in more quilts.

I can see a lot more hand work in my future.


Happy Quilting,

Terry


DOCUMENTATION:
Quilt Name: Quilting Cruise Memories
Description: Folk Art Wool Applique and Embroidery
Pattern: Sue Spargo patterns
Size: 9” x 30¼”
Fabrics: Wool, cotton, leather, wool, cotton and silk threads, beads
Predominant colours: Turquoise, lemon, khaki, red
Construction Techniques: wool applique, embroidery
Back: 100% cotton
Batting: wool
Edge finish: facing
Quilting: Free motion quilted on Domestic Machine
Quilted by: Terry Whyte
Sleeve: yes (corners to insert rod)
Label: yes
Date completed:2013
Inspiration: from a workshop with Sue Spargo while on a quilting cruise in New Zealand and Australia.
Maker: Terry Whyte

Wednesday, April 10, 2013

Belles Bouteilles


Quilt Documentation # 135


Belles Bouteilles

This was an exercise in transparency using organza. It is a little tricky to work with as it is very slippery and also frays easily.


applique detail

I was able to get the shadows by layering the organza which was fused and quilted to the bargello background before sandwiching the batting and backing. Each bottle was appliqued with 2 rows of stitching and then cut out.


applique/quilting detail

The background was quilted with many different designs. This is one of my favourite way of quilting backgrounds to add interest and more fun for me to do. Can you tell I get bored doing the same thing over and over?


quilting


quilting

The highlights were painted on, using silver metallic paint.


painted highlight


This quilt was juried into Quilt Canada 2010 in Calgary, Alberta.


Belles Bouteilles - back, labels


The bargello had been made for another project that never got finished, so I thought it would worked for a background for this project, however......

The judges' critiques:

All three judges thought that the transparency effect was achieved successfully and they liked the quilting. However, one judge thought that the “diagonal line through top of two bottles is disturbing to the eye” and another thought that the “bargello overpowers bottles”.

Good lesson learned! Watch your backgrounds.

I am linking to The Needle and Thread Network, a website featuring Canadian fibre artists and Nina Marie's Off the Wall Friday. Go check out the wonderful fibre art!

Happy quilting,

Terry


DOCUMENTATION:
Quilt Name: Belles Bouteilles
Description: Organza Applique on Bargello background
Pattern: Original
Size: 17½” x 22½”
Fabrics: 100% cotton- Organza
Predominant colours: Blue, green, beige, gold, orange, brown
Construction Techniques: Bargello, machine applique
Back: batik
Batting: cotton
Edge finish: single fold ¼” binding
Quilting: Free motion quilted on Domestic Machine
Quilted by: Terry Whyte
Sleeve: yes
Label: yes
Date completed: 2009
Quilt History: Displayed at the 2011 Kirkland Lake Mile of Gold Quilters' Guild Show, at Museum of Northern History
Maker: Terry Whyte

Wednesday, April 3, 2013

Circle Squared


Quilt Documentation # 134

I made this quilt in this orientation, and it just never “felt” right. Not balanced.

Circle Squared

So while playing with my photos, I flipped it around with the dark at the bottom and I like that a lot better.

Circle Squared - Rotated

What do you think?

I love working with scraps and I like making crazy patchwork and see what I can come up with.

My scraps are sorted by colour......I know, a little obsessive!

So, I grabbed my “Orange” basket and sorted into lights and darks.

"light crazypatch"

"dark crazypatch"


In order to get this to work, I cut a paper pattern, the size I wanted the quilt to be, and drafted my circular design. I then marked it off in a 4” grid and cut it apart.

curved piecing

After foundation piecing light and dark 4” squares, the squares were assemble using curved piecing, just like you would piece Drunkards Path.

It is echo quilted following the centre line using a cotton variegated thread on the front and Razzle from Wonderfil on the back.

quilting and binding

The back was pieced to line up with the front. Even the sleeve and binding follow the curve. Too bad, I think I now have to make another sleeve so I can hang it the way I like it.

Circle Squared - back

back - quilting detail

Linking up to The Needle and Thread Network - check out more Canadian bloggers.
And it's Off the Wall Friday at Nina-Marie's.

Happy Quilting,

Terry

DOCUMENTATION:
Quilt Name: Circle Squared
Description: Crazy-patch
Pattern: original
Size: 24” x 24”
Fabrics: 100% cotton
Predominant colours: Orange
Construction Techniques: 4” crazy patch squares
Back: 100% cotton
Batting:
Edge finish: Double fold french binding
Quilting: Quilted on Domestic Machine
Quilted by: Terry Whyte
Sleeve: yes
Label: no
Date completed: 2008
Quilt History: Display at the 2008 Kirkland Lake Mile of Gold Quilters' Guild Show, at Museum of Northern History.
Maker: Terry Whyte